Prerequisites:
Three servers running an Ubuntu 20.04 operating system on
the Atlantic.Net Cloud Platform
Minimum 16 GB RAM and 5 Core CPUs on each node
A root password is configured on each server
We will use the following setup to demonstrate a three-node
Kubernetes cluster:
|
Kubernetes
Node |
IP
Address |
Operating
System |
|
Master-Node |
x.x.x.x |
Ubuntu 20.04 |
|
Workernode |
x.x.x.x |
Ubuntu 20.04 |
|
Workernode-1 |
x.x.x.x |
Ubuntu 20.04 |
Step 1: Once you are logged in to
your server, run the following command to update your base system with the
latest available packages
sudo apt update -y
Step 2: Disable Swap and
Enable IP Forwarding
Memory swapping causes performance and
stability issues within Kubernetes, so it is recommended to disable Swap and
enable IP forwarding on all nodes.
Step 2.1: First, verify whether
Swap is enabled or not using the following command:
sudo swapon --show

Step 2.2:
Next, run the following command
to disable Swap:
sudo swapoff -a
Step 2.3 To disable Swap
permanently, edit the /etc/fstab file and comment the line containing
swapfile:
sudo nano /etc/fstab
or sudo sed -i '/ swap / s/^/#/' /etc/fstab
Comment or
remove the following line:
/swapfile none swap sw 0 0
Ctrl + o > to Write Out the changes and hit Enter then Ctrl + x > to exit from the file

Step 2.4: Next, edit the
/etc/sysctl.conf file to enable the IP forwarding:
sudo nano /etc/sysctl.conf
Un-comment the following line:
#net.ipv4.ip_forward = 1
Save and close the file, then run
the following command to apply the configuration changes:
Ctrl + o > to Write Out the changes and hit Enter then Ctrl + x > to exit from the file

sudo sysctl -p
Step 3 – Install Docker CE
Kubernetes relies on a Docker container, so
you will need to install the Docker CE on all nodes. The latest version of the
Docker CE is not included in the Ubuntu default repository, so you will need to
add Docker’s official repository to APT.
Step 3.1: First, install
the required dependencies to access Docker repositories over HTTPS:
sudo apt-get install apt-transport-https ca-certificates curl software-properties-common -y

Step 3.2: Next, run the curl
command to download and add Docker’s GPG key:
sudo curl -fsSL https://download.docker.com/linux/ubuntu/gpg | apt-key add -

Step 3.3: Next, add
Docker’s official repository to the APT:
sudo add-apt-repository "deb [arch=amd64] https://download.docker.com/linux/ubuntu $(lsb_release -cs) stable"

Step 3.4: Once the repository is added, run the
following command to install Docker CE:
sudo apt-get install docker-ce -y

Step 3.5 Manage Docker as a non-root user
To create the docker group and
add your user:
Step 3.5.1: Create the
docker group.
sudo groupadd docker
Step 3.5.2: Add your user
to the docker group.
sudo usermod -aG docker $USER
Note: If
you’re running Linux in a virtual machine, it may be necessary to restart the
virtual machine for changes to take effect.
Step 3.5.3: You can also run the following
command to activate the changes to groups:
newgrp docker
Step 3.6: After the installation, verify the Docker
installation using the following command:
sudo docker --version or sudo docker info

Step 4 – Add Kubernetes
Repository
By default, the Kubernetes
package is not included in the Ubuntu 20.04 default repository, so you will
need to add the Kubernetes repository to all nodes.
Step 4.1: First, add the
Kubernetes GPG key:
sudo curl -s https://packages.cloud.google.com/apt/doc/apt-key.gpg | apt-key add

Step 4.2: Next, add the
Kubernetes repository to APT:
sudo apt-add-repository "deb http://apt.kubernetes.io/ kubernetes-xenial main"

Step 4.3: Once the repository is
added, update the APT cache using the command below:
sudo apt-get update -y

Step 5 – Install
Kubernetes Components (Kubectl, kubelet and kubeadm)
Kubernetes depends on three
major components (Kubectl, kubelet and kubeadm) that make up a Kubernetes run
time environment. All three components must be installed on each node.
Step 5.1: Let’s run the
following command on all nodes to install all Kubernetes components:
sudo apt-get install kubelet kubeadm kubectl -y

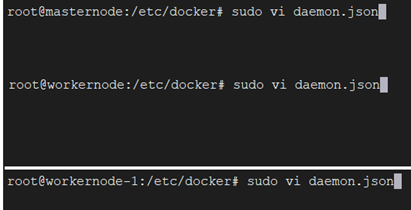
Step 5.2 Next, you will
need to update the cgroupdriver on all nodes. You can do it by creating the
following file:
Create this file
"daemon.json" in the directory "/etc/docker" and
add the following
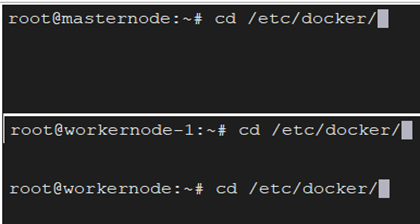
cd /etc/docker
sudo vi daemon.json
{
"exec-opts":
["native.cgroupdriver=systemd"]
}

After
adding the above text to "daemon. json" press ESC from the keyboard
then
Press ESC from the keyboard and type ":wq!" to save
and quit the file.
Step 5.3: Reload the
daemon and verify the docker status
sudo systemctl daemon-reload
sudo systemctl restart docker.service
sudo systemctl enable docker.service

sudo systemctl status docker.service then press "q" to quit

At this point, all Kubernetes
components are installed. Now, you can proceed to the next step.
Step 6 – Initialize Kubernetes
Master Node
In this section, we will see how
to initialize the Kubernetes Master node.
Run the kubeadm command-line tool
to initialize the Kubernetes cluster.
kubeadm init --pod-network-cidr=10.244.0.0/16 or sudo kubeadm init
Once the Kubernetes cluster has been initialized successfully, you will get the following

Verify the Kubeadm version
kubeadm version

Note: if
you observe any initialization errors. please follow the steps (workaround steps
here :)
1. Go to
/etc/containerd directory
2. Remove / Delete the config.toml file
3. Restart "sudo systemctl restart containerd" service
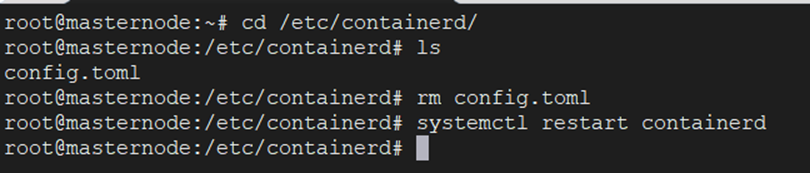
4.
login as sudo su user and try again "kubeadm init"
From the above
output, copy or note down the kubeadm join full command. You will need to run
this command on all worker nodes to join the Kubernetes cluster.
If you are logged in as a
regular user then run the following command to start using your cluster:
mkdir -p $HOME/.kube
sudo cp -i /etc/kubernetes/admin.conf $HOME/.kube/config
sudo chown $(id -u):$(id -g) $HOME/.kube/config

If you are the root user, you
can run the following command:
export KUBECONFIG=/etc/kubernetes/admin.conf
At this point, the Kubernetes
cluster is initialized. You can now proceed to add a pod network.
Step 7 – Deploy a Pod Network
The pod
network is used for communication between all nodes within the Kubernetes
cluster and is necessary for the Kubernetes cluster to function properly.
In this section, we
will add a Flannel pod network on the Kubernetes cluster. Flannel is a virtual
network that attaches IP addresses to containers.
Run the following command on the
Master node to deploy a Flannel pod network.
kubectl apply -f https://raw.githubusercontent.com/coreos/flannel/master/Documentation/kube-flannel.yml

Next, wait for some time for the
pods to be in running state. Then, run the following command to see the status
of all pods:
kubectl get pods --all-namespaces
If everything is fine, you will get the following output:

Step 8 – Join Worker Nodes in
the Kubernetes Cluster
After the successful pod network
initialization, the Kubernetes cluster is ready to join the worker nodes. In
this section, we will show you how to add both worker nodes to the Kubernetes
cluster.
You can use the kubeadm join
command on each worker node to join them to the Kubernetes cluster. Once the
worker node is joined to the cluster, you will get the following output:
Note: The below token can be changed
"kubeadm join 10.9.204.117:6443 --token vg7zgk.w1q2vk6wu4dpz6dd --discovery-token-ca-cert-hash sha256:7859b3220eed6cb614cd54528c5a4d3b46c3e0594e4e0cebc003c3d48b918a60"


Next, go to the master node and run the following command to verify that both worker nodes have joined the cluster:

If you forget the Kubernetes
Cluster joining command, you can retrieve it any time using the following
command on the master node:
kubeadm token create --print-join-command
You will get the Kubernetes Cluster joining command in the following output:
We have successfully installed Kubernetes on our Ubuntu system


